

Here are 10 summer-friendly crockpot recipes perfect for hot days, backyard gatherings, or easy weeknight dinners in the USA. These dishes are light, fresh, and minimize oven use while maximizing seasonal flavors:
Hawaiian Pulled Pork Sliders🌺🍍🍔

Hawaiian Pulled Pork Sliders 🌺🍍🍔
Tender, sweet, and savory pulled pork infused with tropical flavors, served on soft Hawaiian rolls with pineapple coleslaw. Perfect for luaus, game day, or summer gatherings!
Ingredients (Serves 8-10)
Pulled Pork
- 4-5 lbs pork shoulder (Boston butt)
- 1 cup pineapple juice
- ½ cup soy sauce (or tamari for GF)
- ¼ cup brown sugar
- 4 garlic cloves, minced
- 1 tbsp fresh ginger, grated
- 1 onion, sliced
- 1 tsp liquid smoke (optional, for authenticity)
- 1 tsp black pepper
- 1 tsp salt
Pineapple Coleslaw
- 3 cups shredded green cabbage
- 1 cup shredded carrots
- 1 cup pineapple tidbits (fresh or canned)
- ½ cup mayo (or Greek yogurt for lighter option)
- 2 tbsp apple cider vinegar
- 1 tbsp honey
- Salt and pepper to taste
Assembly
- 12 Hawaiian sweet rolls (or slider buns)
- 1 cup barbecue sauce (or teriyaki sauce)
- 8 pineapple rings (grilled or fresh)
- Optional toppings: pickled red onions, jalapeños, cilantro
Instructions
- Prep the Pork:
- Season pork with salt and pepper. Sear in a skillet over high heat for 2-3 minutes per side until browned (optional but adds flavor).
- Place onions in the bottom of a slow cooker. Add pork on top.
- Make the Braising Liquid:
- Whisk pineapple juice, soy sauce, brown sugar, garlic, ginger, and liquid smoke (if using). Pour over pork.
- Cook:
- Slow Cooker: Cover and cook on low 8-10 hours or high 5-6 hours until pork shreds easily.
- Oven: Preheat to 325°F (165°C). Braise in a Dutch oven covered for 4-5 hours.
- Shred & Sauce:
- Remove pork, discard excess fat, and shred with forks. Skim fat from cooking liquid, then mix 1 cup liquid into the pork.
- Make Coleslaw:
- Toss cabbage, carrots, pineapple, mayo, vinegar, honey, salt, and pepper. Chill until serving.
- Assemble Sliders:
- Split Hawaiian rolls. Layer with pulled pork, coleslaw, grilled pineapple, and a drizzle of sauce. Add optional toppings.
Tips & Variations 🌟
- Sweet & Spicy: Add 1 tbsp sriracha to the coleslaw or pork.
- Quick Hack: Use store-bought coleslaw mix and stir in pineapple.
- Vegan Option: Substitute pork with jackfruit and use vegan mayo.
- Grill It: Char pineapple rings and rolls lightly for smoky flavor.
- Meal Prep: Shred pork and store in sauce for up to 3 days.
Serving Ideas
- Pair with tropical fruit salad or macaroni salad.
- Serve with sweet potato fries and mango iced tea.
- Top with crispy fried onions for extra crunch.
Pro Tip: For crispy “burnt ends,” broil shredded pork on a sheet pan for 3-5 minutes before assembling!
Sweet, tangy, and melt-in-your-mouth tender—these sliders are a taste of the tropics! 🏝️🔥
BBQ Chicken Tacos🍗🌮🔥
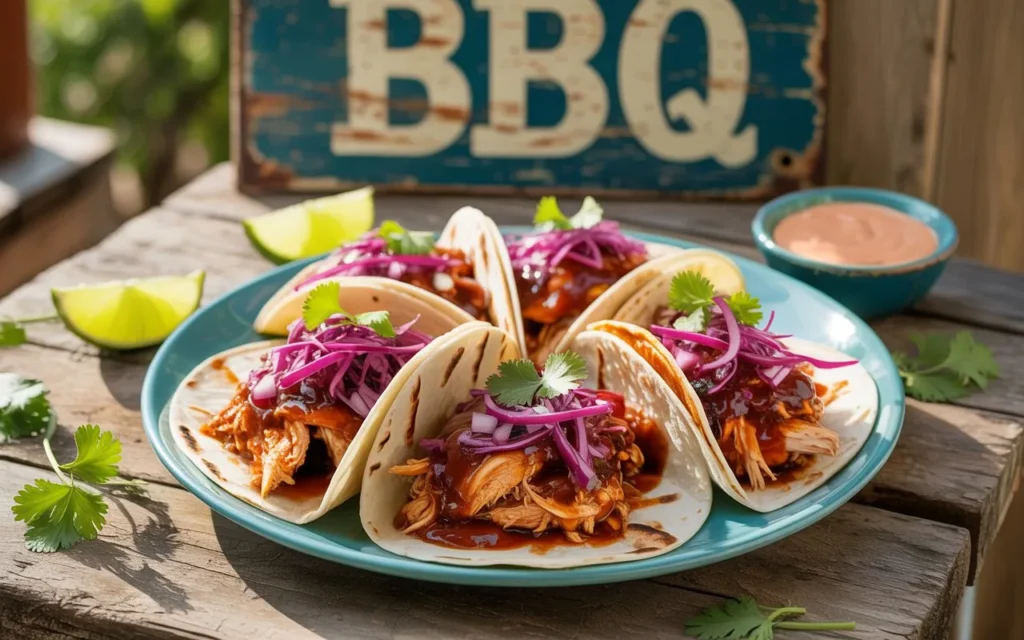
BBQ Chicken Tacos 🍗🌮🔥
Tender, smoky shredded chicken tossed in tangy BBQ sauce, topped with crunchy slaw and creamy avocado—a crowd-pleasing twist on taco night! Perfect for summer BBQs or quick weeknight dinners.
Ingredients (Serves 4)
BBQ Chicken
- 1.5 lbs (680g) boneless, skinless chicken breasts or thighs
- 1 cup BBQ sauce (store-bought or homemade)
- 1 tbsp olive oil
- 1 tsp smoked paprika
- 1 tsp garlic powder
- 1 tsp onion powder
- ½ tsp salt
- ½ tsp black pepper
Lime Slaw
- 2 cups shredded cabbage (green, red, or mix)
- ½ cup shredded carrots
- ¼ cup chopped cilantro
- Juice of 1 lime
- 2 tbsp mayo or Greek yogurt
- 1 tsp honey (optional)
- Salt and pepper to taste
Taco Assembly
- 8 small flour or corn tortillas
- 1 avocado, sliced
- ½ cup crumbled cotija or feta cheese
- Pickled red onions (optional)
- Jalapeños or hot sauce (for heat)
- Extra cilantro and lime wedges
Instructions
- Cook the Chicken:
- Season chicken with smoked paprika, garlic powder, onion powder, salt, and pepper.
- Heat olive oil in a skillet over medium-high. Sear chicken 5-6 minutes per side until golden. Add ½ cup water, cover, and simmer 10-12 minutes until cooked through.
- Shred chicken with forks and toss with BBQ sauce.
- Make the Slaw:
- Mix cabbage, carrots, cilantro, lime juice, mayo/yogurt, honey (if using), salt, and pepper.
- Warm Tortillas:
- Char tortillas over a gas flame or in a dry skillet for 20 seconds per side.
- Assemble Tacos:
- Layer tortillas with BBQ chicken, slaw, avocado, cheese, pickled onions, and jalapeños.
Tips & Variations 🌟
- Grill It: Grill chicken breasts instead of pan-searing for smoky flavor.
- Shortcut: Use rotisserie chicken and skip cooking!
- Vegan Option: Swap chicken for jackfruit or roasted chickpeas; use vegan BBQ sauce and cheese.
- Extra Flavor: Add corn kernels, black beans, or pineapple salsa.
- Meal Prep: Shred chicken and store in BBQ sauce for 3-4 days.
Serving Ideas
- Pair with grilled corn, sweet potato fries, or chips and guacamole.
- Drizzle with cilantro-lime crema (mix sour cream + lime zest).
- Serve with a mango margarita or iced hibiscus tea.
Pro Tip: Double the slaw—it’s great on sandwiches or as a side salad!
Sweet, smoky, and loaded with crunch—these tacos are summer on a tortilla! 🌞✨
Summer Vegetable Ratatouille (Vegan)🌞🍆🍅
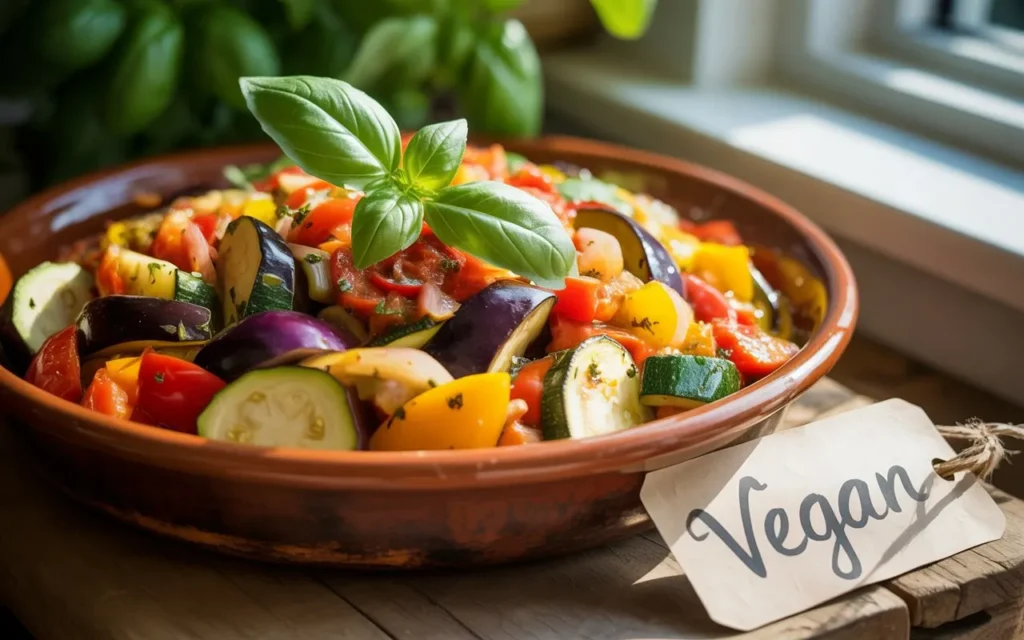
Summer Vegetable Ratatouille (Vegan) 🌞🍆🍅
A vibrant, French-inspired dish bursting with summer’s finest veggies! Slow-cooked to perfection with herbs de Provence, this hearty stew is gluten-free, oil-free optional, and perfect over grains, pasta, or crusty bread.
Ingredients (Serves 4-6)
- 1 medium eggplant, diced
- 2 zucchinis, sliced into rounds
- 1 yellow squash, sliced into rounds
- 1 red bell pepper, chopped
- 1 yellow bell pepper, chopped
- 1 large onion, diced
- 4 garlic cloves, minced
- 3 large tomatoes, diced (or 1 can crushed tomatoes)
- ¼ cup tomato paste
- ¼ cup fresh basil, chopped (or 2 tsp dried)
- 1 tbsp fresh thyme (or 1 tsp dried)
- 1 tsp dried rosemary
- 1 tsp smoked paprika
- ½ tsp red pepper flakes (optional, for heat)
- 3 tbsp olive oil (or ½ cup veg broth for oil-free)
- Salt and pepper to taste
- Optional garnish: Fresh parsley, vegan Parmesan, or toasted pine nuts
Instructions
- Prep the Veggies:
- Sprinkle diced eggplant with salt and let sit 15 minutes to draw out bitterness. Rinse and pat dry.
- Sauté Aromatics:
- Heat olive oil (or broth) in a large pot/Dutch oven over medium heat. Add onion and garlic, sautéing until fragrant (3-4 mins).
- Cook the Veggies:
- Add eggplant, zucchini, squash, and bell peppers. Cook 8-10 minutes until slightly softened.
- Stir in tomatoes, tomato paste, herbs, smoked paprika, red pepper flakes, salt, and pepper.
- Simmer:
- Reduce heat to low. Cover and simmer 20-25 minutes, stirring occasionally, until veggies are tender but not mushy.
- Finish:
- Stir in fresh basil. Taste and adjust seasoning.
Tips & Variations 🌱
- Oil-Free: Use veg broth or water for sautéing.
- Grill/Roast First: Char veggies on the grill or roast at 400°F (200°C) for 15 mins before simmering for smoky depth.
- Add Protein: Stir in cooked chickpeas or white beans.
- Herb Swap: Use herbes de Provence or oregano instead of rosemary/thyme.
- Make It Fancy: Arrange veggie slices in a spiral pattern in a baking dish, bake at 375°F (190°C) for 40 mins.
Serving Ideas
- Over: Polenta, quinoa, or couscous.
- With: Garlic-rubbed sourdough or vegan garlic bread.
- Top With: Cashew cream, vegan ricotta, or a drizzle of balsamic reduction.
Pro Tip: Ratatouille tastes even better the next day! Store in the fridge for up to 4 days or freeze for 3 months.
Celebrate summer’s bounty with this colorful, fragrant, and nourishing dish! 🇫🇷✨
Lemon Garlic Butter Salmon🍋🐟
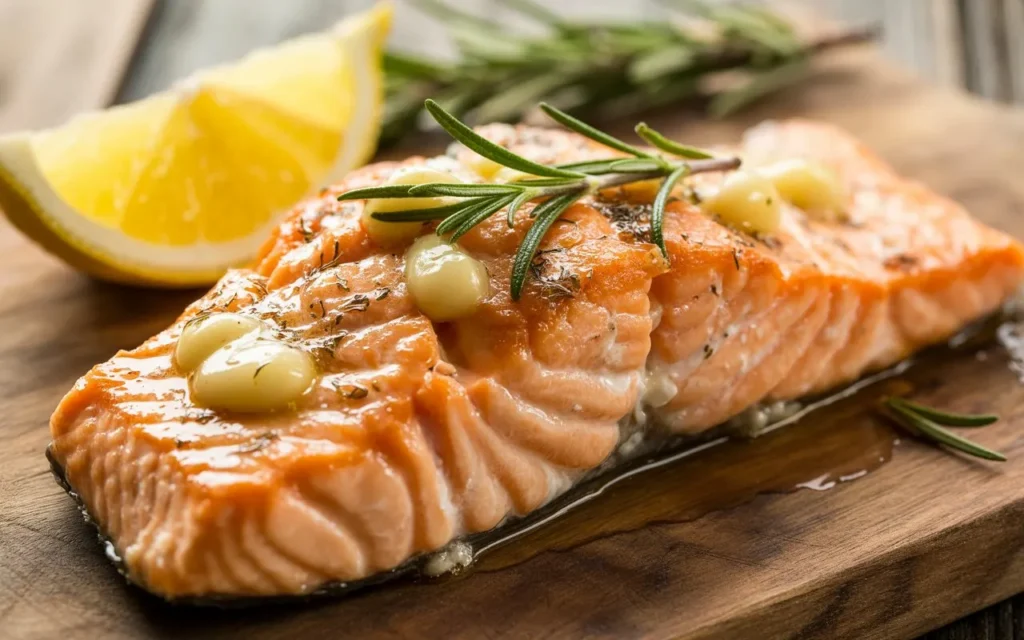
Lemon Garlic Butter Salmon Recipe
Ingredients (Serves 4):
- 4 salmon fillets (6-8 oz each, skin-on or off)
- 1/2 tsp salt (adjust to taste)
- 1/2 tsp black pepper
- 2 tbsp olive oil
- 3 tbsp unsalted butter
- 4 garlic cloves, minced
- 1/4 cup fresh lemon juice (about 1 large lemon)
- 1 tsp lemon zest (optional, for brightness)
- 2 tbsp chopped fresh parsley (or dill)
- Optional: 1/4 tsp red pepper flakes, lemon slices for garnish
Instructions:
- Prep the Salmon:
- Pat salmon fillets dry with paper towels. Season both sides with salt and pepper.
- Cook the Salmon:
- Heat olive oil in a large skillet over medium-high heat. Once hot, add salmon skin-side down (if using skin-on). Sear for 4-5 minutes until golden and crisp. Flip and cook another 3-4 minutes until internal temp reaches 145°F. Transfer to a plate and tent with foil to keep warm.
- Make the Sauce:
- Reduce heat to medium. Melt butter in the same skillet. Add minced garlic and sauté 30 seconds until fragrant (avoid browning).
- Stir in lemon juice, zest (if using), and red pepper flakes. Simmer 1-2 minutes to meld flavors. Remove from heat and stir in parsley.
- Serve:
- Spoon the lemon garlic butter sauce over the salmon. Garnish with lemon slices and extra parsley.
Tips:
- Don’t overcrowd the pan: Cook in batches if needed for even searing.
- Adjust acidity: Add lemon juice gradually to taste.
- Pairings: Serve with roasted asparagus, garlic mashed potatoes, or a crisp green salad.
Enjoy your vibrant, buttery salmon with a zesty kick! 🍋🐟
Slow Cooker Chicken Tortilla Soup🌮🍲
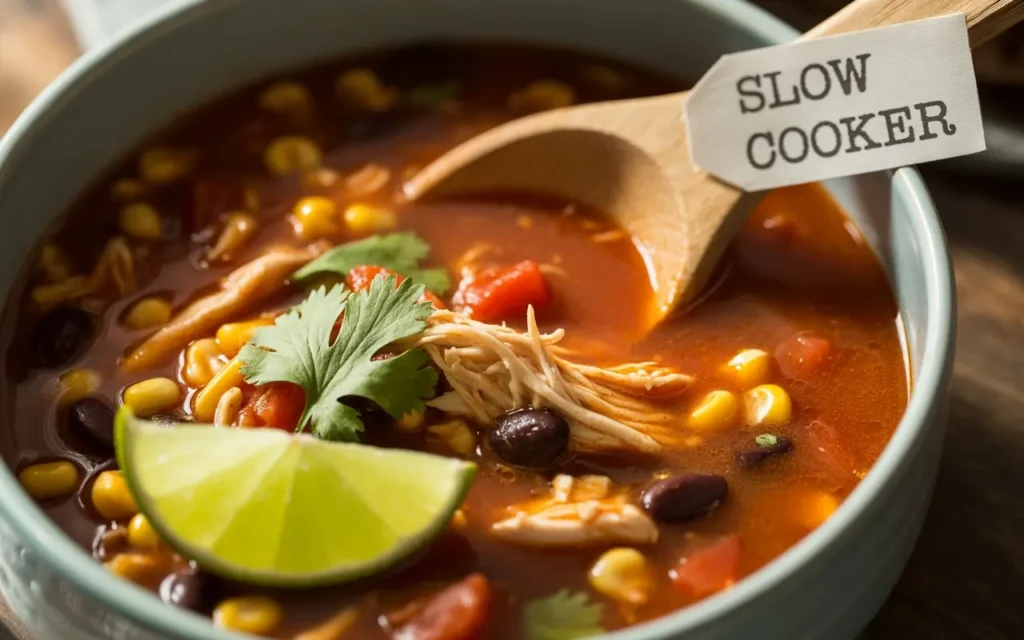
Slow Cooker Chicken Tortilla Soup Recipe
Warm, hearty, and packed with flavor—perfect for cozy nights!
Ingredients (Serves 6–8):
- 1.5 lbs boneless, skinless chicken breasts or thighs
- 1 tbsp olive oil
- 1 onion, diced
- 4 garlic cloves, minced
- 1 jalapeño, seeded and diced (optional for heat)
- 1 (15-oz) can black beans, drained and rinsed
- 1 (15-oz) can pinto beans, drained and rinsed
- 1 (15-oz) can corn kernels, drained
- 1 (14.5-oz) can fire-roasted diced tomatoes
- 4 cups low-sodium chicken broth
- 1 tsp ground cumin
- 1 tsp chili powder
- 1 tsp smoked paprika
- 1/2 tsp dried oregano
- Salt and pepper to taste
For Serving:
- Tortilla strips or chips
- Avocado slices
- Fresh cilantro, chopped
- Lime wedges
- Shredded cheese (cotija, cheddar, or Monterey Jack)
- Sour cream or Greek yogurt
Instructions:
- Prep the Base:
- Heat olive oil in a skillet over medium heat. Sauté onion, garlic, and jalapeño (if using) for 3–4 minutes until softened.
- Layer in the Slow Cooker:
- Add sautéed veggies to the slow cooker.
- Place chicken on top, then add beans, corn, tomatoes, broth, cumin, chili powder, paprika, oregano, 1 tsp salt, and 1/2 tsp black pepper. Stir gently.
- Cook:
- Cover and cook on HIGH for 3–4 hours or LOW for 6–7 hours.
- Shred the Chicken:
- Remove chicken, shred with two forks, and return to the pot. Taste and adjust salt/pepper as needed.
- Serve:
- Ladle soup into bowls and top with crushed tortilla chips, avocado, cilantro, lime juice, cheese, and a dollop of sour cream.
Tips:
- Short on time? Use pre-cooked rotisserie chicken (add it in the last 30 minutes).
- Spice it up: Add a dash of cayenne or top with pickled jalapeños.
- Freezer-friendly: Store cooled soup in airtight containers for up to 3 months.
- Vegetarian? Swap chicken for extra beans and use veggie broth.
Enjoy this comforting, customizable bowl of goodness! 🌮🍲
Mississippi Chicken Sandwiches🥪🔥
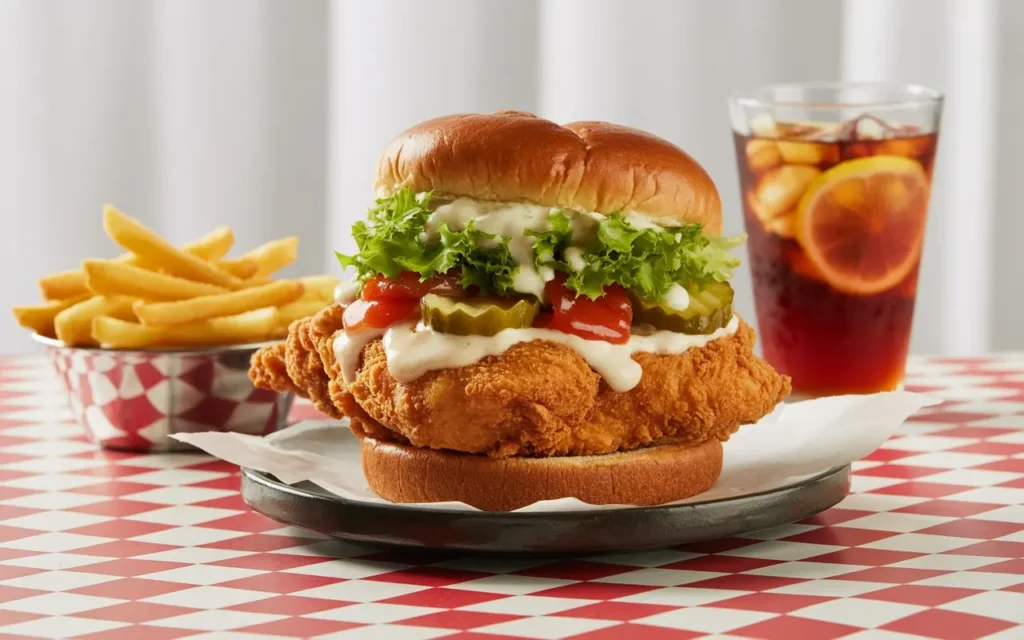
Mississippi Chicken Sandwiches Recipe
Tangy, savory, and melt-in-your-mouth tender chicken piled high on buttery buns!
Ingredients (Serves 6–8):
- 2 lbs boneless, skinless chicken breasts or thighs
- 1 (1-oz) packet ranch seasoning mix
- 1 (1-oz) packet au jus gravy mix
- 8–10 pepperoncini peppers (plus 1/4 cup brine from the jar)
- 1/2 cup unsalted butter, sliced into pats
- 1 tsp garlic powder
- 1/2 tsp black pepper
- 1 cup shredded provolone or mozzarella cheese (optional, for topping)
- 6–8 brioche buns, potato rolls, or ciabatta rolls
- Optional toppings: extra pepperoncini slices, pickled red onions, coleslaw, mayo
Instructions:
- Prep the Slow Cooker:
- Place chicken in the slow cooker. Sprinkle ranch seasoning, au jus mix, garlic powder, and black pepper evenly over the chicken.
- Add Peppers and Butter:
- Scatter pepperoncini peppers over the chicken. Pour in the pepperoncini brine and place butter pats on top.
- Cook:
- Cover and cook on HIGH for 3–4 hours or LOW for 6–7 hours, until chicken shreds easily with a fork.
- Shred and Mix:
- Remove chicken, shred with two forks, and return to the slow cooker. Stir to coat the chicken in the flavorful juices. Let sit for 10 minutes to absorb the sauce.
- Assemble Sandwiches:
- Toast buns lightly if desired. Pile shredded chicken onto the buns, top with cheese (if using), and add optional toppings like coleslaw, extra peppers, or a drizzle of mayo.
Tips:
- Spice level: Adjust by adding more pepperoncini brine or a pinch of red pepper flakes.
- Shortcut: Use 2 cups shredded rotisserie chicken + 1/2 cup broth. Simmer with seasoning packets, butter, and peppers for 20 minutes.
- Instant Pot version: Cook on High Pressure for 15 minutes with 1 cup broth. Natural release, then shred.
- Leftovers: Store in the fridge for up to 3 days or freeze for 2 months.
Serving Ideas:
- Pair with crispy sweet potato fries or a simple dill pickle salad.
- For a lighter option, serve the chicken in lettuce wraps instead of buns.
Enjoy the bold, tangy flavors of this crowd-pleasing sandwich! 🥪🔥
Tex-Mex Street Corn Dip🌽🔥
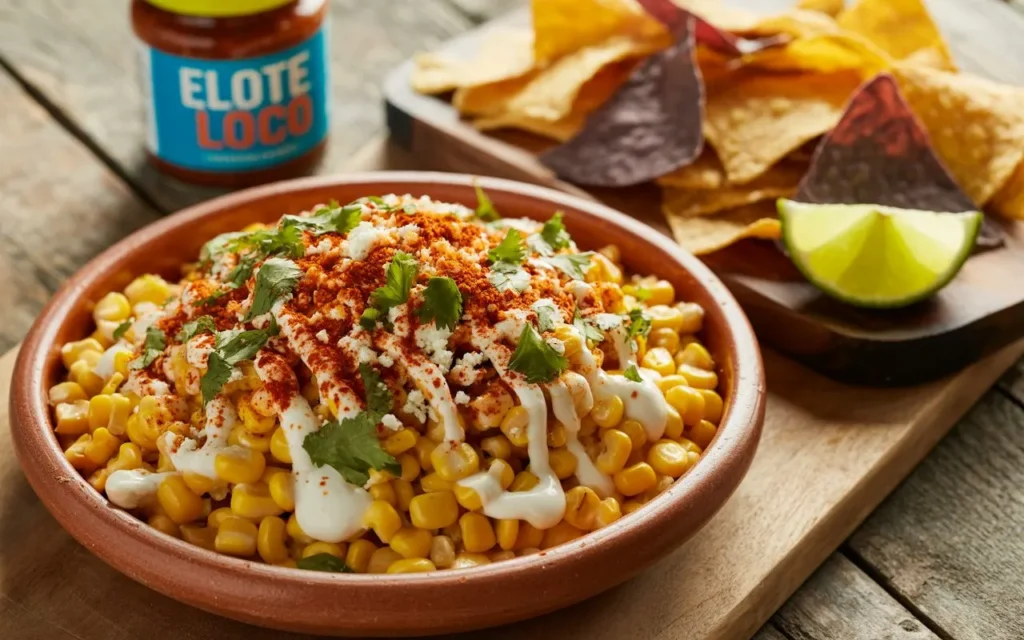
Tex-Mex Street Corn Dip Recipe
Creamy, smoky, and bursting with bold flavors—perfect for parties or game day!
Ingredients (Serves 6–8):
- 4 cups corn kernels (fresh, canned, or frozen—thawed and drained)
- 1/2 cup mayonnaise
- 1/2 cup sour cream (or Greek yogurt for a lighter option)
- 1/2 cup cotija cheese, crumbled (sub feta or queso fresco)
- 1/4 cup finely chopped red onion
- 1 jalapeño, seeded and minced (optional for heat)
- 1/3 cup fresh cilantro, chopped
- 2 cloves garlic, minced
- 1 tsp chili powder (plus extra for garnish)
- 1/2 tsp smoked paprika
- 1/4 tsp cumin
- Juice of 1 lime (about 2 tbsp)
- Salt and pepper to taste
- Optional mix-ins: 1/2 cup shredded pepper Jack cheese, 1 diced avocado, or 1/2 cup chopped roasted poblano pepper
For Serving:
- Tortilla chips, toasted baguette slices, or veggie sticks
- Lime wedges, extra cotija, and cilantro for garnish
Instructions:
- Prep the Corn:
- If using fresh corn, char it in a skillet over medium-high heat for 5–7 minutes until lightly blackened (optional but adds smoky flavor).
- Mix the Dip:
- In a large bowl, combine corn, mayonnaise, sour cream, cotija, red onion, jalapeño, cilantro, garlic, chili powder, smoked paprika, cumin, and lime juice. Stir until creamy.
- Taste and season with salt and pepper. For extra spice, add a pinch of cayenne.
- Chill (Optional):
- Cover and refrigerate for 30 minutes to let flavors meld (or serve immediately for a fresher texture).
- Serve:
- Transfer to a serving bowl. Top with extra cotija, a sprinkle of chili powder, and cilantro. Serve with chips and lime wedges.
Tips:
- Grill it up: Grill corn on the cob first for a charred, authentic street corn flavor.
- Make it warm: For a hot dip, mix in 1/2 cup pepper Jack cheese and bake at 375°F (190°C) for 15–20 minutes until bubbly.
- Dairy-free? Use vegan mayo, dairy-free sour cream, and omit cotija (or use a vegan cheese substitute).
- Make-ahead: Prep the dip 1 day in advance—store in the fridge and stir before serving.
Pairings:
- Serve with icy margaritas, Mexican beer, or a crisp white wine.
- Pair with grilled meats or tacos for a full Tex-Mex feast!
Enjoy this crowd-pleasing dip that’s as addictive as the street cart original! 🌽🔥
Honey Sriracha Meatballs🔥🍯
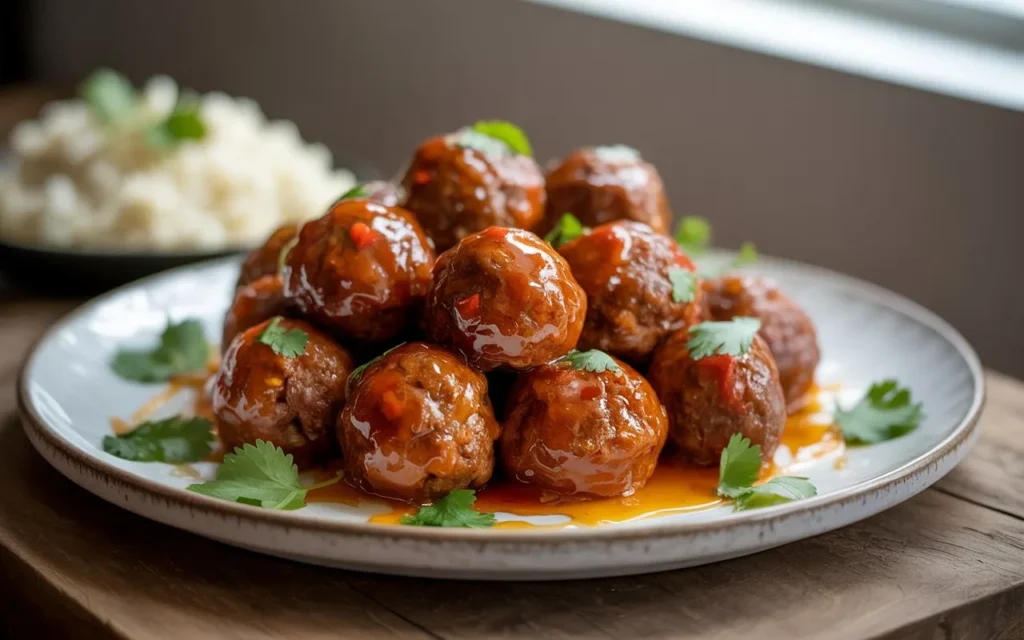
Honey Sriracha Meatballs Recipe
Sweet, spicy, and irresistibly sticky—perfect for parties, game day, or a quick weeknight meal!
Ingredients (Serves 4–6):
For the Meatballs:
- 1 lb ground beef (or sub ground turkey/chicken/pork)
- 1/4 cup breadcrumbs (panko or regular)
- 1 large egg
- 3 garlic cloves, minced
- 1 tbsp fresh ginger, grated
- 1 tbsp soy sauce (or tamari for gluten-free)
- 1/2 tsp salt
- 1/4 tsp black pepper
For the Sauce:
- 1/3 cup honey
- 1/4 cup Sriracha (adjust to taste)
- 3 tbsp soy sauce (or tamari)
- 2 tbsp rice vinegar (or lime juice)
- 1 tbsp sesame oil
- 2 garlic cloves, minced
- 1 tsp cornstarch + 1 tbsp water (slurry)
Optional Garnishes:
- Sesame seeds
- Sliced green onions
- Lime wedges
Instructions:
- Prep the Meatballs:
- Preheat oven to 400°F (200°C). Line a baking sheet with parchment paper.
- In a bowl, combine ground beef, breadcrumbs, egg, garlic, ginger, soy sauce, salt, and pepper. Mix gently (don’t overwork).
- Roll into 1-inch balls (about 20–24) and place on the baking sheet.
- Bake:
- Bake meatballs for 15–18 minutes, until cooked through (internal temp 160°F for beef).
- Make the Sauce:
- In a saucepan over medium heat, whisk together honey, Sriracha, soy sauce, rice vinegar, sesame oil, and garlic. Simmer 2–3 minutes.
- Stir in cornstarch slurry and cook 1–2 minutes until thickened.
- Coat & Serve:
- Toss baked meatballs in the sauce until fully coated. Garnish with sesame seeds and green onions.
- Serve immediately with lime wedges for a zesty kick!
Tips:
- Spice level: Reduce Sriracha to 2 tbsp for mild, or add 1/2 tsp red pepper flakes for extra heat.
- Cooking methods: Pan-fry meatballs in 1 tbsp oil for a crispier texture, or simmer them directly in the sauce for 10 minutes.
- Make-ahead: Freeze uncooked meatballs for up to 3 months. Thaw before baking.
- Serving ideas: Serve over jasmine rice, zucchini noodles, or as an appetizer with toothpicks.
Pairings:
- Cool sides like cucumber salad, steamed bok choy, or coconut rice balance the heat.
- Crisp lager or a citrusy IPA complements the bold flavors.
Enjoy these fiery-sweet bites that disappear fast! 🔥🍯
Summer Shrimp Boil🦐🌽🔥
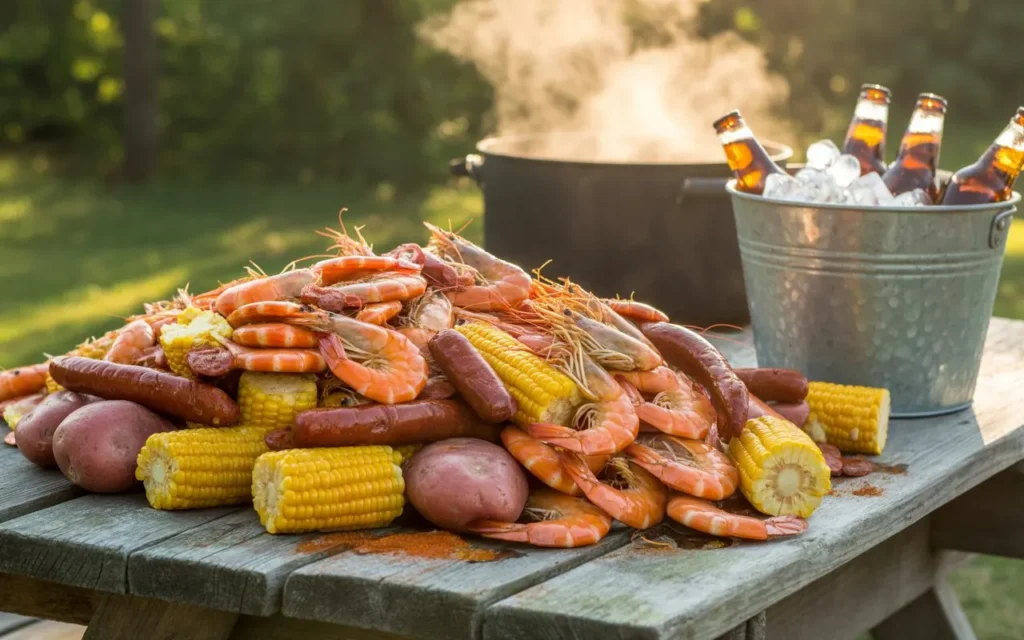
Summer Shrimp Boil Recipe
Juicy shrimp, tender potatoes, sweet corn, and smoky sausage simmered in a zesty, garlicky broth—perfect for backyard gatherings or beachside feasts!
Ingredients (Serves 6–8):
- 2 lbs large shrimp (peeled and deveined, tails on for presentation)
- 1 lb baby potatoes (halved if large)
- 4 ears fresh corn, shucked and cut into thirds
- 1 lb smoked sausage (Andouille or kielbasa), sliced into 1-inch pieces
- 1 lemon, sliced into wedges (plus extra for serving)
- 1/2 cup unsalted butter
- 1/4 cup Old Bay seasoning (or Cajun seasoning, adjust to taste)
- 1 tbsp garlic powder
- 1 tsp paprika
- 1 tsp crushed red pepper flakes (optional for heat)
- 6 cups water or chicken broth (for extra flavor)
- Optional add-ins: 1 onion (quartered), 1 lb clams or crab legs, fresh parsley, or a bag of frozen shrimp boil seasoning
For Serving:
- Melted butter or garlic butter for dipping
- Crusty bread or baguette
- Hot sauce (e.g., Crystal or Tabasco)
Instructions:
- Prep the Pot:
- In an extra-large stockpot or Dutch oven, combine water/broth, Old Bay, garlic powder, paprika, red pepper flakes, and butter. Bring to a rolling boil.
- Cook the Potatoes & Corn:
- Add potatoes and onion (if using) to the pot. Boil for 10 minutes.
- Add corn and sausage. Boil for 5 more minutes.
- Add the Shrimp:
- Toss in shrimp (and clams/crab legs, if using). Cook for 2–3 minutes until shrimp turn pink and opaque. Do not overcook!
- Drain & Serve:
- Carefully drain the boil (save a little broth for dipping if desired). Spread the shrimp boil on a large tray or newspaper-lined table.
- Garnish & Feast:
- Squeeze lemon wedges over everything. Sprinkle with chopped parsley and serve with melted butter, hot sauce, and crusty bread for soaking up the juices.
Tips:
- Grill it! For a smoky twist, toss boiled ingredients on the grill for 2–3 minutes after cooking.
- Make it ahead: Par-cook potatoes and corn, then refrigerate. Reheat with shrimp and sausage just before serving.
- Spice level: Adjust seasoning to taste—add more Old Bay for saltiness or red pepper flakes for heat.
- Shortcut: Use frozen pre-cooked shrimp; add them last and simmer just until heated through.
- Dietary swaps: Use turkey sausage or vegan butter for lighter options.
Pairings:
- Drinks: Ice-cold beer, lemonade, or a crisp rosé.
- Sides: Coleslaw, avocado salad, or grilled garlic bread.
- Dessert: Fresh watermelon or key lime pie.
Dive into this messy, flavorful feast that screams summer! 🦐🌽🔥
Peach Cobbler (Dessert)🍑🍨🔥

Peach Cobbler Recipe
Juicy, sweet peaches baked under a buttery, golden crust—warm, comforting, and perfect with a scoop of vanilla ice cream!
Ingredients (Serves 6–8):
For the Filling:
- 6 cups fresh peaches, peeled and sliced (about 6–8 medium peaches)*
- 1/2 cup granulated sugar
- 1 tbsp lemon juice
- 1 tsp vanilla extract
- 1/4 tsp ground cinnamon
- 1/8 tsp ground nutmeg (optional)
- 1 tbsp cornstarch (to thicken juices)
For the Cobbler Topping:
- 1 cup all-purpose flour
- 1/2 cup granulated sugar
- 1 1/2 tsp baking powder
- 1/4 tsp salt
- 3/4 cup milk (whole or buttermilk for extra tang)
- 1/2 cup unsalted butter, melted
- 1 tsp vanilla extract (optional)
Optional Add-Ins:
- 1/4 tsp almond extract (for depth)
- 1 tbsp turbinado sugar (for a crunchy top)
For Serving:
- Vanilla ice cream or whipped cream
Instructions:
- Prep the Peaches:
- In a large bowl, toss sliced peaches with lemon juice, sugar, vanilla, cinnamon, nutmeg, and cornstarch. Let sit for 15 minutes to release juices.
- Preheat & Prep Dish:
- Preheat oven to 375°F (190°C).
- Pour melted butter into a 9×13-inch baking dish, swirling to coat the bottom.
- Make the Batter:
- In a bowl, whisk flour, sugar, baking powder, and salt. Stir in milk and vanilla until just combined (a few lumps are okay).
- Assemble the Cobbler:
- Pour the batter over the melted butter in the baking dish—do not stir!
- Spoon the peach mixture (and juices) evenly over the batter.
- Bake:
- Bake for 40–45 minutes until the top is golden and the filling bubbles at the edges.
- Optional: Sprinkle turbinado sugar over the top during the last 5 minutes for a caramelized crunch.
- Cool & Serve:
- Let cool 10–15 minutes (the filling will thicken as it rests). Serve warm with vanilla ice cream.
Tips:
- Peach shortcuts: Use 2 (15-oz) cans of drained peaches in syrup (reduce sugar to 1/4 cup).
- Gluten-free? Swap flour for a 1:1 gluten-free blend.
- Crispier crust: Add 1/4 cup coarse cornmeal to the batter.
- Spice it up: Add a pinch of cardamom or ginger to the peaches.
- Make ahead: Assemble the cobbler (unbaked) and refrigerate for up to 24 hours. Bake as directed.
Pairings:
- Serve with a drizzle of caramel sauce or a sprinkle of toasted pecans.
- Pair with iced tea, sparkling rosé, or a cold glass of milk.
Enjoy this summer classic that tastes like sunshine in every bite! 🍑🍨🔥
Tips for Summer Crockpot Success:
- Use liners for easy cleanup during busy days.
- Opt for shorter cook times (4–6 hours on low) to avoid overcooking.
- Add fresh herbs (basil, cilantro, mint) at the end for brightness.
These recipes balance hearty comfort with seasonal freshness—ideal for beating the heat without sacrificing flavor! 🍑🌽🔥
Here’s a balanced look at the benefits and potential downsides (“evil”) of using summer crockpot recipes, along with tips to maximize the pros and minimize the cons:
Benefits (Pros) 🌟
- Heat-Free Cooking
- Avoids using the oven, keeping your kitchen cool during hot summer days.
- Ideal for small apartments or homes without AC.
- Time-Saving Convenience
- “Set it and forget it” frees up time for outdoor activities, pool days, or hosting.
- Great for meal prepping salads, proteins, or sides for the week.
- Energy Efficiency
- Uses less energy than traditional ovens, lowering utility bills.
- Crowd-Pleasing Versatility
- Perfect for BBQs, potlucks, or family gatherings (e.g., dips, pulled meats, tacos).
- Accommodates dietary needs (vegan, gluten-free, etc.) with adaptable recipes.
- Preserves Nutrients
- Slow-cooking retains vitamins in summer veggies (zucchini, tomatoes, corn).
Potential Downsides (Cons) ⚠️
- Added Indoor Heat
- The crockpot itself can emit warmth, slightly raising kitchen temps.
- Fix: Run it in a shaded outdoor area (e.g., patio) or overnight.
- Overcooked Textures
- Delicate summer produce (spinach, shrimp) can turn mushy if overcooked.
- Fix: Add fragile ingredients in the last 30–60 minutes of cooking.
- Heavy or Rich Dishes
- Some recipes (cheesy dips, creamy soups) may feel too heavy for hot weather.
- Fix: Opt for lighter recipes (citrus-infused meats, veggie stews).
- Food Safety Risks
- Leaving perishable ingredients (dairy, meat) in a warm crockpot too long can breed bacteria.
- Fix: Never leave food on “warm” for more than 2 hours.
- Limited “Summer Vibes”
- Slow-cooked meals lack the fresh, raw appeal of salads or grilled dishes.
- Fix: Pair crockpot mains with crisp sides (grilled corn, chilled slaw).
Tips to Maximize Benefits & Minimize Downsides
- Use Liners: Simplify cleanup with disposable crockpot liners.
- Go Lighter: Focus on recipes with citrus, herbs, and lean proteins (chicken, fish).
- Batch Cook: Prep freezer-friendly meals (soups, shredded meats) during cooler mornings.
- Hybrid Cooking: Finish dishes on the grill (e.g., sear meats after slow-cooking).
Final Verdict ✅
Crockpots are a summer kitchen hero if used strategically! Stick to lighter, veggie-forward recipes and avoid leaving dishes unattended in heat. When balanced with fresh sides, they’re a game-changer for stress-free summer meals.
What’s your biggest crockpot challenge? I can help troubleshoot! 🍲🌞
Summer Crockpot Recipes FAQ 🌞🍲
1. Q: Won’t using a crockpot in summer make my kitchen hotter?
A: Crockpots generate minimal heat compared to ovens! For extra coolness:
- Place the cooker in a shaded spot or on a patio.
- Opt for shorter cook times (4–6 hours) to avoid prolonged warmth.
2. Q: What are the best summer-friendly crockpot recipes?
A: Focus on lighter, fresher dishes:
- Vegetable-forward: Ratatouille, corn chowder, or stuffed peppers.
- Proteins: Citrus-marinated chicken, shrimp boils, or pulled pork for sliders.
- Dips: Street corn dip, black bean salsa, or spinach-artichoke (use low-fat ingredients).
3. Q: Can I cook vegetarian/vegan meals in a crockpot?
A: Absolutely! Try:
- Lentil chili, coconut curry with tofu, or quinoa-stuffed zucchini.
- Use veggie broth and coconut milk for creaminess.
4. Q: How do I prevent summer veggies from getting mushy?
A: Add delicate ingredients (zucchini, spinach, tomatoes) in the last 30–60 minutes of cooking.
5. Q: Is it safe to leave a crockpot unattended outdoors?
A: Yes, but:
- Keep it on a stable surface away from direct sunlight.
- Use a waterproof outlet if plugged in outside.
- Never leave perishable food in the “warm” setting for over 2 hours.
6. Q: Can I adapt recipes for gluten-free or low-carb diets?
A: Easily!
- Swap soy sauce for tamari (GF).
- Replace grains with cauliflower rice or zucchini noodles.
- Use lettuce wraps instead of buns for sliders.
7. Q: What are common mistakes to avoid?
A:
- Overfilling: Leave 1–2 inches of space for even cooking.
- Lifting the lid: Releases heat and adds 15–20 mins to cook time.
- Wrong cuts: Use lean meats (chicken breast) for shorter cooks, fatty cuts (pork shoulder) for longer ones.
8. Q: How do I store leftovers safely in hot weather?
A:
- Cool food quickly and refrigerate within 2 hours (1 hour if above 90°F).
- Freeze portions in airtight containers for up to 3 months.
9. Q: Can I make desserts in a summer crockpot?
A: Yes! Try:
- Peach cobbler, chocolate lava cake, or cinnamon-apple oatmeal (serve chilled).
10. Q: Is a crockpot energy-efficient for summer?
A: Yes! It uses about as much energy as a standard light bulb—far less than an oven or stove.
Bonus Tip: Pair crockpot mains with fresh sides like salads, grilled corn, or chilled fruit for a balanced summer meal!
Have more questions? Drop them below! 🧑🍳🔥
Leave a Reply