

Table of Content
When throwing the ideal cookout, the main course usually hogs the spotlight, whether it’s burgers, ribs or steaks sizzling on the grill. But there’s one trick most grillmasters know: The secret to a truly unforgettable cookout is in the sides.
Think of it: all of that perfectly grilled meat served with sides so good and packed with flavor they become the stars of the feast. No matter if your entertaining family, neighbors or friends, these best 10 side dishes for a cookout will take your summer meal to the next level.
Classic Potato Salad
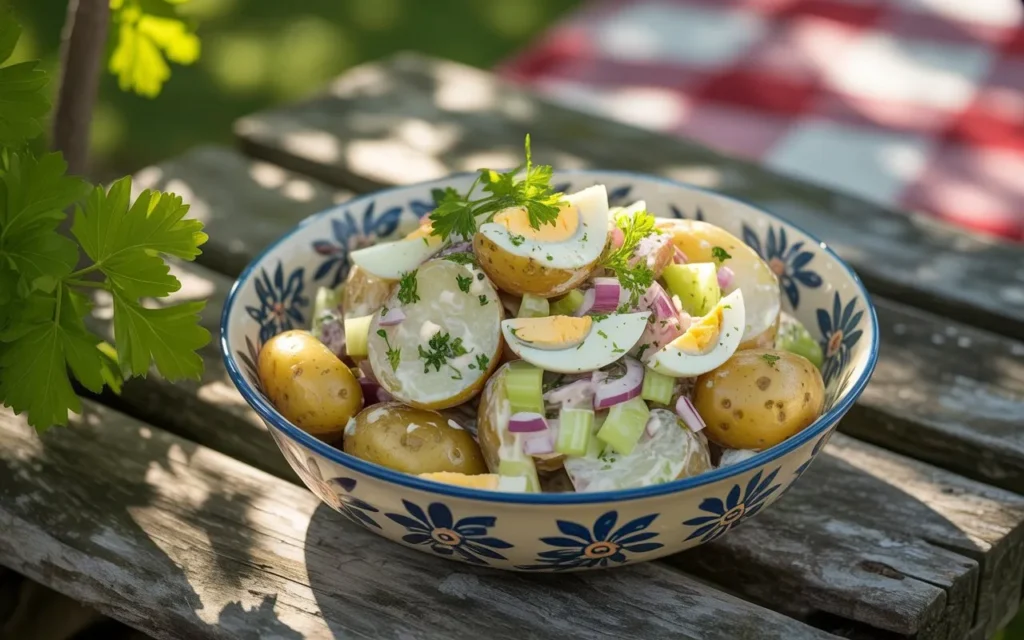
🥔 Classic Potato Salad 🥗
A timeless, creamy side dish perfect for picnics, BBQs, or family dinners. Simple, comforting, and endlessly customizable!
Ingredients
Serves 6–8
For the Salad:
- 2 lbs (900g) Yukon Gold or red potatoes, scrubbed and cut into 1-inch chunks
- 4 large eggs
- ½ cup celery, finely diced
- ¼ cup red onion or green onions, finely chopped
- 2 tbsp fresh parsley, chopped
Creamy Dressing:
- 1 cup mayonnaise (or Greek yogurt for a lighter option)
- 2 tbsp yellow mustard
- 1 tbsp apple cider vinegar or pickle juice
- 1 tsp sugar (optional)
- ½ tsp celery seed (optional)
- 1 tsp salt
- ½ tsp black pepper
Optional Add-Ins:
- ¼ cup dill pickles or sweet relish
- 2 tbsp fresh dill, chopped
- Paprika or chives for garnish
Instructions
- Cook the Potatoes & Eggs:
- Place potatoes in a large pot, cover with cold water, and add 1 tsp salt. Bring to a boil, then reduce heat and simmer 10–15 minutes until tender but firm. Drain and let cool slightly.
- Meanwhile, boil eggs: Cover eggs with water, bring to a boil, then remove from heat, cover, and let sit 10–12 minutes. Transfer to ice water, peel, and chop.
- Make the Dressing:
- In a bowl, whisk mayo, mustard, vinegar, sugar, celery seed, salt, and pepper.
- Assemble the Salad:
- In a large bowl, gently combine warm potatoes, eggs, celery, onion, and parsley. Pour dressing over and fold to coat.
- For best flavor, let sit 30 minutes at room temperature, then cover and chill 1–2 hours before serving.
- Serve:
- Garnish with paprika, chives, or extra parsley. Serve chilled.
🌟 Pro Tips & Variations
Dietary Swaps:
- Vegan: Skip eggs, use vegan mayo, and add ½ cup chopped pickles for tang.
- Lighter: Swap half the mayo with Greek yogurt.
Flavor Boosts:
- Smoky Twist: Add ¼ tsp smoked paprika to the dressing.
- Herb Love: Stir in fresh dill or tarragon.
- Crunch Factor: Toss in ¼ cup diced radish or bell pepper.
Avoid Mushy Potatoes:
- Don’t overcook! Test with a fork at 10 minutes.
- Cool potatoes slightly before mixing to absorb dressing without breaking apart.
Meal Prep:
- Stores in the fridge for 3–4 days (tastes better the next day!).
Why You’ll Love It
- Creamy & Tangy: The dressing strikes the perfect balance.
- Crowd-Pleasing: A staple at summer gatherings.
- Customizable: Add bacon, pickles, or your favorite veggies.
Pair with grilled burgers, fried chicken, or enjoy it solo! 🍔✨
Nutrition (per serving):
Calories: ~280 | Protein: 5g | Carbs: 20g | Fat: 20g
Fun Fact:
Potato salad dates back to the 16th century in Europe, but the mayo-based version became popular in the U.S. in the 19th century.
Dig in and savor the nostalgia! 🥄🌼
Grilled Corn on the Cob
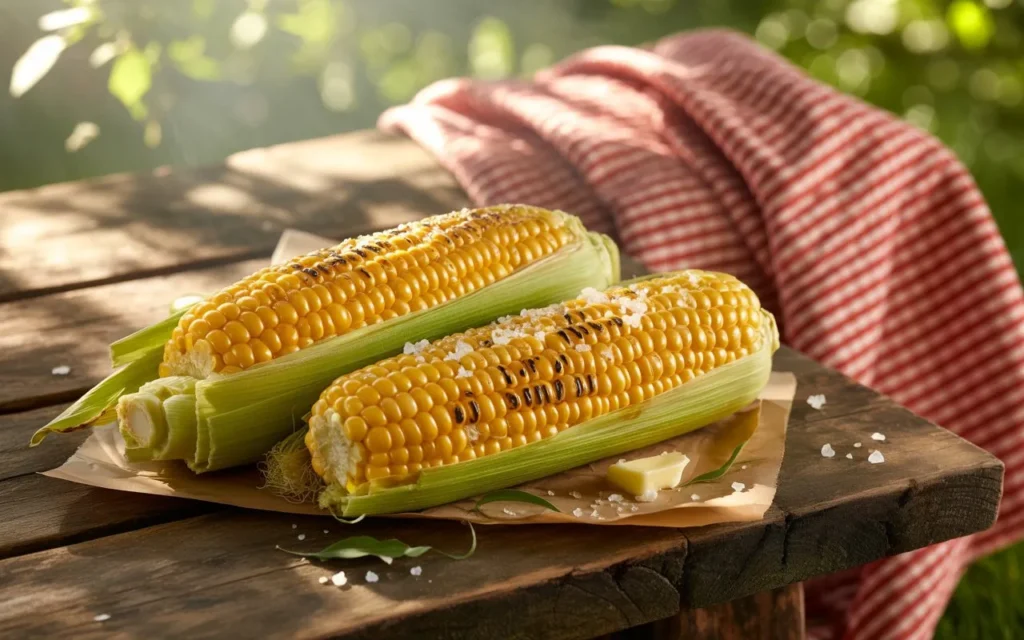
🌽 Grilled Corn on the Cob with Flavored Butters 🔥
Sweet, smoky, and slathered in your choice of zesty, spicy, or herbed butter—this summer staple is a BBQ must-have!
Ingredients
Serves 4–6
For the Corn:
- 6 ears fresh corn, husks on or off
- 2 tbsp olive oil or melted butter
- Salt to taste
Flavored Butter Options (Pick 1+):
- Classic Garlic-Herb:
- ¼ cup softened butter
- 1 garlic clove, minced
- 1 tbsp chopped parsley, chives, or cilantro
- Spicy Lime-Chili:
- ¼ cup softened butter
- Zest and juice of 1 lime
- ½ tsp chili powder
- ¼ tsp cayenne (optional)
- Parmesan-Paprika:
- ¼ cup softened butter
- 2 tbsp grated Parmesan
- 1 tsp smoked paprika
Optional Garnishes:
- Lime wedges
- Cotija cheese or Tajín seasoning
- Fresh herbs or hot sauce
Instructions
- Prep the Corn:
- Husk-On Method: Peel back husks (don’t remove), remove silk, then rewrap husks. Soak in water 15–30 minutes to prevent burning.
- Husk-Off Method: Brush shucked corn with oil/butter and season lightly with salt.
- Grill:
- Preheat grill to medium-high (400°F/200°C).
- Husk-On: Grill corn 15–20 minutes, turning occasionally, until husks are charred.
- Husk-Off: Grill 8–12 minutes, rotating often, until kernels are charred in spots.
- Flavor & Serve:
- Peel husks (if using) and brush corn with flavored butter of choice.
- Sprinkle with salt and garnish. Serve hot!
🌟 Pro Tips & Variations
For Perfect Corn:
- Soak Husk-On Corn: Ensures steam cooks the kernels and prevents flare-ups.
- Char Wisely: A few blackened spots add flavor, but don’t overcook—kernels should stay juicy.
Dietary Swaps:
- Vegan: Use olive oil and vegan butter. Skip cheese garnishes.
- Extra Zing: Add a drizzle of honey or hot honey post-grill.
Creative Twists:
- Elote-Style: Slather with mayo, sprinkle with chili powder, cotija, and lime.
- Truffle Butter: Mix 1 tsp truffle oil into butter for decadence.
Avoid Drying Out:
- Keep husks on until serving to retain moisture.
- Baste with butter/oil halfway through grilling if husks are off.
Why You’ll Love It
- Quick & Versatile: Ready in 20 minutes with endless flavor options.
- Summer Essential: Pairs perfectly with burgers, ribs, or grilled veggies.
- Crowd-Pleasing: Let guests customize their own with butter and toppings!
Pair with icy lemonade, a crisp lager, or a smoky mezcal cocktail! 🍹🍺
Fun Fact:
Corn has been cultivated for over 9,000 years, originating in Mexico. Grilling it amplifies its natural sweetness through caramelization!
Char, butter, and enjoy the taste of sunshine! 🌞🌽
Baked Mac and Cheese
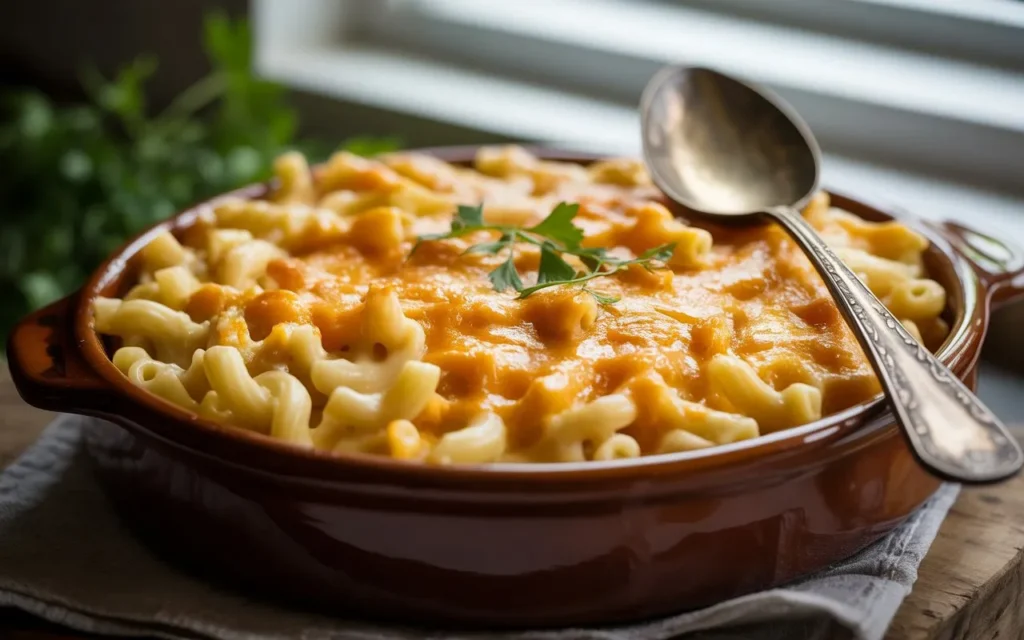
🧀 Ultimate Baked Mac and Cheese 🍝
A creamy, golden-brown classic with a crispy breadcrumb topping. Comfort food at its finest—gooey, cheesy, and irresistibly rich!
Ingredients
Serves 6–8
For the Mac:
- 16 oz (450g) elbow macaroni (or cavatappi/shells)
- 4 tbsp unsalted butter
- ¼ cup all-purpose flour (sub gluten-free 1:1 flour if needed)
- 3 cups whole milk (warm)
- 1 cup heavy cream (or half-and-half for lighter option)
- 3 cups shredded sharp cheddar cheese
- 1½ cups shredded Gruyère or Monterey Jack cheese
- ½ cup grated Parmesan
- 1 tsp Dijon mustard
- ½ tsp smoked paprika
- ½ tsp garlic powder
- Salt and pepper to taste
Topping:
- 1 cup panko breadcrumbs (or crushed Ritz crackers)
- 2 tbsp melted butter
- ¼ cup grated Parmesan
- 1 tbsp chopped parsley (optional)
Optional Mix-Ins:
- ½ cup cooked bacon, pancetta, or diced ham
- 1 cup sautéed mushrooms or roasted broccoli
- 1 tsp hot sauce or diced jalapeños
Instructions
- Cook the Pasta:
- Boil macaroni in salted water until al dente (1–2 minutes less than package instructions). Drain and set aside.
- Make the Cheese Sauce (Béchamel):
- Melt butter in a large pot over medium heat. Whisk in flour and cook 2–3 minutes until golden (don’t let it brown).
- Slowly pour in warm milk and cream, whisking constantly until smooth. Simmer 3–5 minutes until thickened.
- Reduce heat to low. Stir in Dijon, smoked paprika, garlic powder, salt, and pepper.
- Gradually add shredded cheeses (reserve ½ cup cheddar for topping), stirring until melted and silky.
- Combine & Assemble:
- Fold cooked pasta into the cheese sauce. Pour into a greased 9×13-inch baking dish.
- Optional: Mix in cooked bacon, veggies, or hot sauce.
- Add Topping:
- Toss breadcrumbs with melted butter and Parmesan. Sprinkle evenly over the mac and cheese.
- Bake:
- Bake at 375°F (190°C) for 25–30 minutes until bubbly and golden. Broil 1–2 minutes for extra crispiness.
- Serve:
- Let rest 5 minutes. Garnish with parsley and dig in!
🌟 Pro Tips & Variations
Dietary Swaps:
- Gluten-Free: Use GF pasta and flour. Skip breadcrumbs or use crushed GF crackers.
- Vegan: Swap butter for vegan butter, milk for unsweetened plant-based milk, and cheeses for vegan shreds (add 2 tbsp nutritional yeast for umami).
Flavor Hacks:
- Extra Creamy: Add 4 oz cream cheese to the sauce.
- Smoky Depth: Stir in ½ tsp liquid smoke or chipotle powder.
- Lobster Mac: Fold in 1 cup cooked lobster meat before baking.
Avoid Grainy Sauce:
- Grate cheese yourself (pre-shredded has anti-caking agents that can make sauce grainy).
- Keep heat low when melting cheese to prevent separation.
Meal Prep:
- Assemble unbaked mac and cheese, cover, and refrigerate for up to 2 days. Bake fresh!
- Freeze baked portions for up to 3 months (reheat in oven at 350°F).
Why You’ll Love It
- Crispy vs. Creamy: The golden breadcrumb topping contrasts the luscious cheese sauce.
- Crowd-Pleasing: A hit at holidays, potlucks, or cozy nights in.
- Customizable: Add your favorite proteins, veggies, or spices.
Pair with garlic bread, roasted Brussels sprouts, or a crisp green salad! 🥗✨
Nutrition (per serving):
Calories: ~600 | Protein: 25g | Carbs: 45g | Fat: 35g
Fun Fact:
Thomas Jefferson popularized mac and cheese in the U.S. after tasting it in Europe—he even served it at a presidential dinner in 1802!
Bake, scoop, and savor the ultimate comfort food! 🥄🔥
Crisp Coleslaw
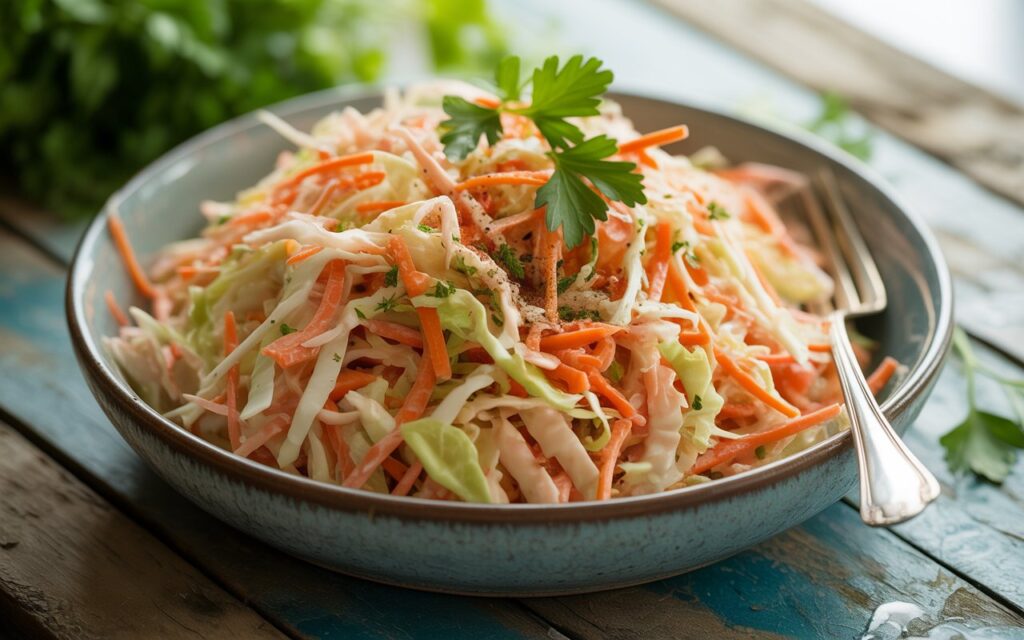
🥬 Crisp Coleslaw with Tangy Dressing 🥕
A classic, crunchy side dish with the perfect balance of creamy and tangy flavors. Ideal for BBQs, picnics, or topping pulled pork sandwiches! Stays crisp for days.
Ingredients
Serves 6–8
For the Slaw:
- ½ medium green cabbage, thinly shredded (about 6 cups)
- ½ small red cabbage, thinly shredded (about 2 cups)
- 2 large carrots, grated
- ½ red onion, thinly sliced (optional)
- ¼ cup fresh parsley, chopped
Creamy Dressing:
- ¾ cup mayonnaise (sub Greek yogurt or vegan mayo)
- 3 tbsp apple cider vinegar
- 2 tbsp sugar (or honey/maple syrup)
- 1 tbsp Dijon mustard
- 1 tsp celery seeds
- ½ tsp garlic powder
- ½ tsp salt
- ¼ tsp black pepper
Optional Add-Ins:
- 1 crisp apple, julienned
- ½ cup raisins or dried cranberries
- 1 jalapeño, seeded and minced
Instructions
- Prep the Veggies:
- Thinly shred green and red cabbage using a knife, mandoline, or food processor. Grate carrots and slice red onion (if using).
- Make the Dressing:
- In a bowl, whisk mayo, vinegar, sugar, Dijon, celery seeds, garlic powder, salt, and pepper until smooth.
- Combine & Chill:
- In a large bowl, toss cabbage, carrots, onion, and parsley with dressing. Mix well.
- Cover and refrigerate at least 1 hour (up to 24 hours) to let flavors meld.
- Serve:
- Stir before serving. Garnish with extra parsley or celery seeds.
🌟 Pro Tips & Variations
For Maximum Crispness:
- Salt the cabbage: Toss shredded cabbage with 1 tsp salt, let sit 10 minutes, then rinse and pat dry.
- Drain excess liquid: If making ahead, pour off pooled dressing before serving.
Dietary Swaps:
- Vegan: Use vegan mayo and maple syrup.
- Sugar-Free: Substitute sugar with monk fruit or omit entirely.
Flavor Twists:
- Asian-Inspired: Swap dressing with rice vinegar, soy sauce, and sesame oil.
- Spicy Kick: Add ½ tsp cayenne or a dash of hot sauce.
Meal Prep:
- Stores in the fridge for 3–4 days (flavor improves over time!).
Why You’ll Love It
- Crunch Factor: Fresh cabbage and carrots stay satisfyingly crisp.
- Versatile: Pairs with fried chicken, fish tacos, or piled on pulled pork.
- Crowd-Pleasing: A potluck staple that everyone recognizes and loves.
Pair with smoky ribs, cornbread, or a chilled craft beer! 🍖🍺
Nutrition (per serving):
Calories: ~150 | Protein: 2g | Carbs: 10g | Fat: 12g
Fun Fact:
Coleslaw comes from the Dutch koolsla (“cabbage salad”) and dates back to the 18th century. It’s been a BBQ essential ever since!
Chill, crunch, and enjoy the simplicity! 🌞✨
Deviled Eggs
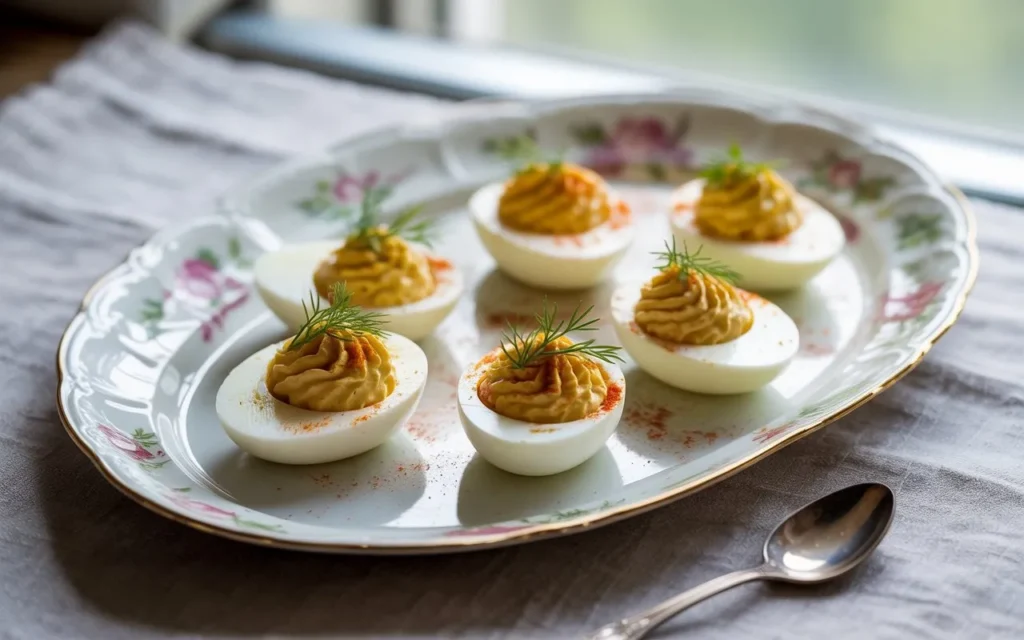
🥚 Classic Deviled Eggs with a Twist 🌿
Creamy, tangy, and perfectly seasoned—these deviled eggs are a crowd-pleasing appetizer for picnics, holidays, or elegant gatherings. Easy to customize with your favorite add-ins!
Ingredients
Makes 12 halves (6 whole eggs)
- 6 large eggs
- ¼ cup (60g) mayonnaise
- 1 tsp Dijon mustard (or yellow mustard)
- 1 tsp white vinegar or pickle juice
- ¼ tsp salt
- ¼ tsp black pepper
- Paprika, for garnish
- Optional: Fresh chives, dill, or crispy bacon, chopped
Instructions
- Perfect Hard-Boiled Eggs:
- Place eggs in a pot and cover with cold water by 1 inch. Bring to a boil, then remove from heat, cover, and let sit 12 minutes.
- Transfer eggs to an ice bath for 15 minutes to cool. Peel under running water for ease.
- Prep the Eggs:
- Slice eggs in half lengthwise. Gently pop out yolks into a bowl. Arrange whites on a serving plate.
- Make the Filling:
- Mash yolks with a fork until smooth. Mix in mayo, mustard, vinegar, salt, and pepper. Adjust consistency with more mayo if needed.
- Fill & Garnish:
- Spoon or pipe filling into egg whites. Sprinkle with paprika and optional herbs or bacon.
- Chill & Serve:
- Refrigerate for 30 minutes before serving. Keep chilled until ready to eat.
🌟 Pro Tips & Variations
For Flawless Eggs:
- Farm-fresh eggs are harder to peel—use eggs that are 7–10 days old.
- No ice bath? Tap eggs gently on the counter to crack shells before peeling.
Dietary Swaps:
- Lighter: Substitute mayo with Greek yogurt or avocado.
- Vegan: Use mashed chickpeas + vegan mayo + turmeric for color.
Flavor Twists:
- Spicy: Add ¼ tsp cayenne or a dash of hot sauce.
- Smoky: Mix in 1 tsp smoked paprika or crumbled bacon.
- Zesty: Fold in 1 tbsp relish or capers.
Presentation Hacks:
- Use a piping bag with a star tip for elegant filling.
- Garnish with microgreens, caviar, or everything bagel seasoning.
Why You’ll Love Them
- Retro Chic: A timeless appetizer that never goes out of style.
- Quick & Easy: Ready in 30 minutes with pantry staples.
- Customizable: Sweet, spicy, or herby—make them your own!
Pair with sparkling wine, iced tea, or a charcuterie board! 🥂✨
Nutrition (per half):
Calories: ~60 | Protein: 3g | Carbs: 0g | Fat: 5g
Fun Fact:
Deviled eggs date back to ancient Rome, where they were served as a first course with spicy sauces. The term “deviled” became popular in the 18th century to describe zesty, seasoned dishes.
Whip, fill, and watch them disappear! 🍽️🔥
Pasta Salad
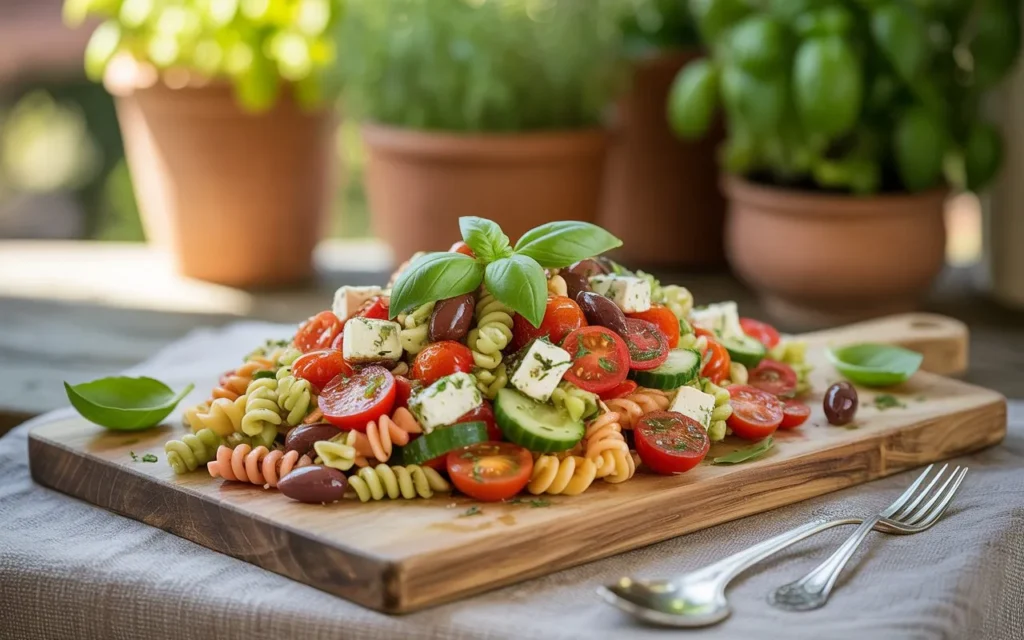
🍝 Classic Pasta Salad with Italian Dressing 🌿
A vibrant, crowd-pleasing salad loaded with fresh veggies, tangy olives, and zesty Italian herbs. Perfect for picnics, BBQs, or meal prep! Gluten-free and vegan-friendly.
Ingredients
Serves 6–8
For the Salad:
- 12 oz (340g) pasta (rotini, penne, or farfalle; use GF pasta if needed)
- 1 cup cherry tomatoes, halved
- 1 English cucumber, diced
- ½ red onion, thinly sliced
- 1 bell pepper (any color), diced
- ½ cup Kalamata olives, pitted
- ½ cup pepperoncini peppers, sliced (optional)
- ⅓ cup fresh parsley or basil, chopped
- ¼ cup grated Parmesan (sub vegan Parmesan or omit)
Italian Dressing:
- ⅓ cup olive oil
- ¼ cup red wine vinegar
- 1 tbsp lemon juice
- 1 tsp Dijon mustard
- 1 garlic clove, minced
- 1 tsp dried oregano
- 1 tsp dried basil
- ½ tsp red pepper flakes (optional)
- 1 tsp honey or maple syrup
- Salt and pepper to taste
Optional Add-Ins:
- 1 cup mozzarella pearls or chickpeas
- Grilled chicken, salami, or prosciutto
- Artichoke hearts or sun-dried tomatoes
Instructions
- Cook the Pasta:
- Boil pasta in salted water until al dente. Drain, rinse under cold water, and toss with 1 tsp olive oil to prevent sticking.
- Prep the Veggies:
- Dice cucumber, bell pepper, halve tomatoes, and slice olives, onion, and pepperoncini.
- Make the Dressing:
- Whisk olive oil, vinegar, lemon juice, Dijon, garlic, oregano, basil, red pepper flakes, honey, salt, and pepper.
- Assemble the Salad:
- In a large bowl, combine pasta, veggies, herbs, and Parmesan. Pour dressing over and toss gently.
- Add optional proteins or cheeses if using.
- Chill & Serve:
- Refrigerate 1 hour for flavors to meld. Garnish with extra herbs and a sprinkle of Parmesan.
🌟 Pro Tips & Variations
Dietary Swaps:
- Gluten-Free: Use GF pasta (chickpea or brown rice).
- Vegan: Skip cheese or use vegan Parmesan.
Flavor Hacks:
- Herb Freshness: Swap dried herbs for 2 tbsp chopped fresh basil + 1 tbsp fresh oregano.
- Briny Boost: Add 2 tbsp capers or chopped artichoke hearts.
- Creamy Twist: Stir in ¼ cup pesto or Greek yogurt.
Avoid Sogginess:
- Salt and drain diced cucumber for 10 minutes before adding.
- Toss pasta with dressing just before serving if prepping ahead.
Meal Prep:
- Stores in the fridge for 3–4 days (add fresh herbs when serving).
Why You’ll Love It
- Bright & Zesty: The Italian dressing adds tangy, herby freshness.
- Versatile: Swap veggies based on what’s in season or your pantry.
- Crowd-Pleasing: A guaranteed hit at potlucks and summer gatherings!
Pair with grilled meats, garlic bread, or a crisp white wine! 🥖🍷
Nutrition (per serving):
Calories: ~280 | Protein: 8g | Carbs: 35g | Fat: 12g
Fun Fact:
Pasta salads became popular in the U.S. in the 1970s as a cold, portable dish for picnics and parties.
Toss, chill, and enjoy the taste of summer! 🌞✨
Barbecue Baked Beans
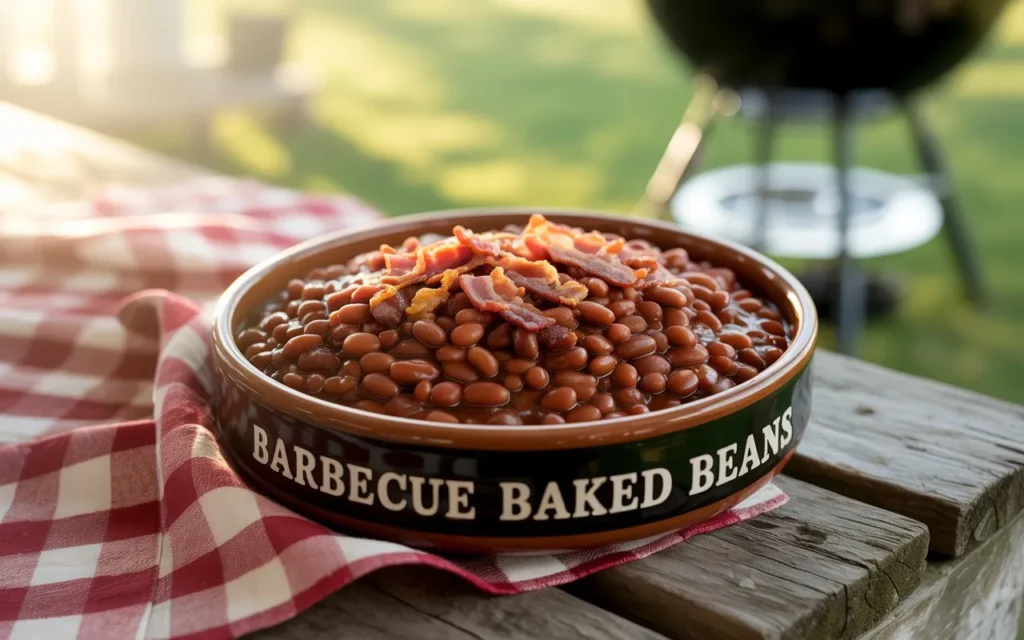
🍖 Smoky Barbecue Baked Beans 🌶️
Sweet, smoky, and slightly spicy—these baked beans are slow-cooked to perfection with bacon, brown sugar, and a tangy BBQ kick. Perfect for cookouts, potlucks, or as a hearty side dish!
Ingredients
Serves 8–10
Base:
- 6 slices bacon, chopped (sub 2 tbsp liquid smoke + 2 tbsp oil for vegetarian)
- 1 medium onion, diced
- 3 garlic cloves, minced
- 2 (28 oz) cans baked beans (or 4 (15 oz) cans navy/pinto beans, drained)
- 1 (15 oz) can kidney beans, drained
BBQ Sauce Mix:
- 1 cup barbecue sauce (store-bought or homemade)
- ⅓ cup ketchup
- ¼ cup molasses or dark brown sugar
- 2 tbsp apple cider vinegar
- 2 tbsp yellow mustard
- 1 tbsp Worcestershire sauce (use vegan if needed)
- 1 tsp smoked paprika
- ½ tsp chili powder
- ½ tsp black pepper
Optional Add-Ins:
- 1 jalapeño, seeded and diced (for heat)
- 1 green bell pepper, diced
- ½ cup crispy fried onions (for topping)
Instructions
- Cook the Bacon & Aromatics:
- Preheat oven to 350°F (175°C).
- In a large oven-safe skillet or Dutch oven, cook bacon over medium heat until crispy. Remove and set aside, leaving 2 tbsp grease in the pan.
- Sauté onion in bacon grease for 3–4 minutes until soft. Add garlic and cook 1 minute.
- Combine Ingredients:
- Stir in baked beans, kidney beans, cooked bacon, BBQ sauce, ketchup, molasses, vinegar, mustard, Worcestershire, smoked paprika, chili powder, and pepper.
- Add jalapeño or bell pepper if using. Mix well.
- Bake:
- Cover and bake 45–60 minutes until thickened and bubbly. Uncover for the last 15 minutes to caramelize the top.
- Serve:
- Garnish with crispy fried onions or fresh parsley. Serve hot!
🌟 Pro Tips & Variations
Dietary Swaps:
- Vegetarian/Vegan: Skip bacon, use liquid smoke + oil, and vegan Worcestershire.
- Gluten-Free: Ensure BBQ sauce and Worcestershire are GF.
Flavor Hacks:
- Bourbon Twist: Add 2 tbsp bourbon with the sauce mix.
- Extra Smoky: Stir in ½ tsp chipotle powder or a dash of hot sauce.
- Sweet & Spicy: Add 1 tbsp honey and ½ tsp cayenne.
Shortcut:
- Use a slow cooker! Sauté bacon/onion first, then combine all ingredients and cook on low 4–6 hours.
Avoid Sogginess:
- Drain and rinse canned beans if not using pre-sauced baked beans.
- Simmer uncovered on the stovetop for 10 minutes to thicken before baking.
Why You’ll Love It
- Crowd-Pleasing: A BBQ staple that pairs with ribs, burgers, or grilled veggies.
- Meal-Prep Friendly: Tastes even better the next day!
- Customizable: Adjust sweetness, heat, or smokiness to your taste.
Pair with cornbread, coleslaw, and a cold beer! 🍺🌽
Nutrition (per serving):
Calories: ~250 | Protein: 9g | Carbs: 45g | Fat: 5g
Fun Fact:
Baked beans have roots in Native American cuisine, where they were slow-cooked with maple syrup and bear fat. The modern BBQ version evolved in the American South!
Simmer, bake, and savor the smoky-sweet magic! 🔥🍯
Caprese Skewers
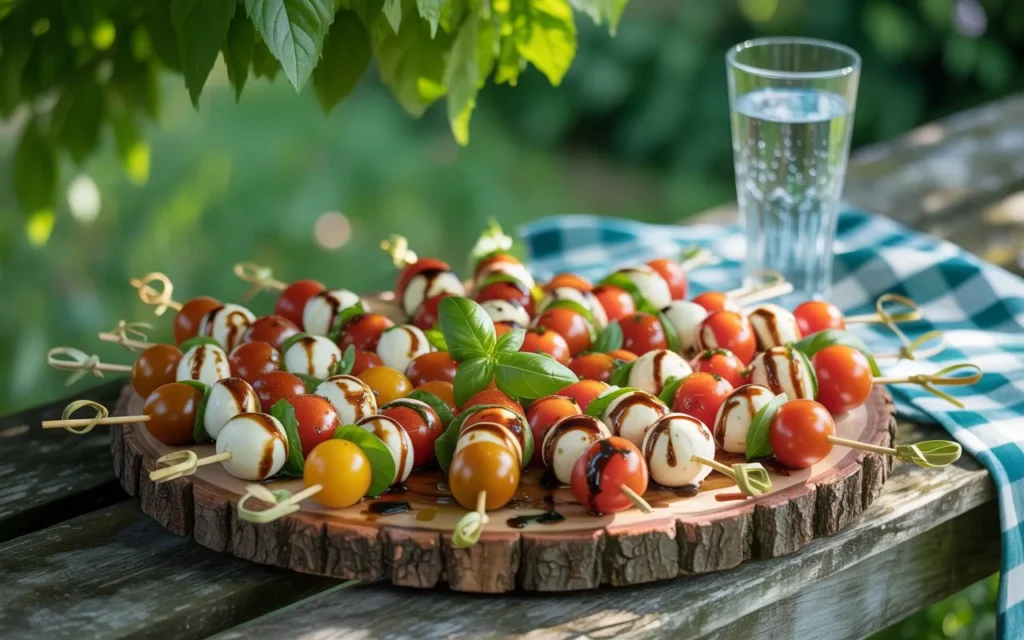
🍅 Caprese Skewers with Balsamic Glaze 🌿
A bite-sized, elegant twist on the classic Caprese salad! Fresh mozzarella, juicy tomatoes, and basil threaded onto skewers, then drizzled with tangy balsamic glaze. Perfect for parties, appetizers, or summer snacking.
Ingredients
Makes 12 skewers
- 12 cherry tomatoes
- 12 small fresh mozzarella balls (ciliegine or bocconcini)
- 24 fresh basil leaves
- 2 tbsp extra-virgin olive oil
- 2 tbsp balsamic glaze (plus extra for drizzling)
- Flaky sea salt and black pepper
- Optional: 12 thin slices prosciutto or salami
Instructions
- Prep the Skewers:
- If using prosciutto, fold each slice into a ribbon-like strip.
- Thread onto skewers in this order: cherry tomato → basil leaf → mozzarella ball → prosciutto (if using). Repeat for all skewers.
- Season & Drizzle:
- Arrange skewers on a platter. Drizzle with olive oil and balsamic glaze.
- Sprinkle with flaky salt and pepper.
- Serve:
- Serve immediately, or chill up to 1 hour before serving. Add an extra drizzle of balsamic glaze just before serving.
🌟 Pro Tips & Variations
For Best Results:
- Use fresh basil leaves (avoid bruised or wilted ones).
- Skewer size: Use 4–6 inch wooden or metal skewers. If using wooden, soak them in water for 10 minutes first.
Dietary Swaps:
- Vegetarian: Skip prosciutto.
- Vegan: Use vegan mozzarella (like almond-based) and a balsamic reduction.
Flavor Twists:
- Herbaceous: Add a tiny mint or oregano leaf between layers.
- Sweet & Savory: Thread a small cube of cantaloupe or watermelon.
- Olive Love: Add a pitted Kalamata olive to each skewer.
Make Ahead:
- Prep components (wash/dry basil, drain mozzarella) up to 1 day in advance. Assemble skewers 1–2 hours before serving.
Why You’ll Love Them
- 5-Minute Prep: Effortless yet impressive.
- Portable: Ideal for picnics, charcuterie boards, or cocktail hour.
- Customizable: Swap ingredients to match your theme or pantry.
Pair with Prosecco, rosé, or a crisp white wine! 🥂✨
Nutrition (per skewer):
Calories: ~60 | Protein: 3g | Carbs: 2g | Fat: 4g
Fun Fact:
Caprese salads (and skewers!) get their name from the Italian island of Capri. The red (tomato), white (mozzarella), and green (basil) mirror the colors of the Italian flag 🇮🇹.
Skewer, drizzle, and watch them disappear! 🍴💫
Grilled Vegetables
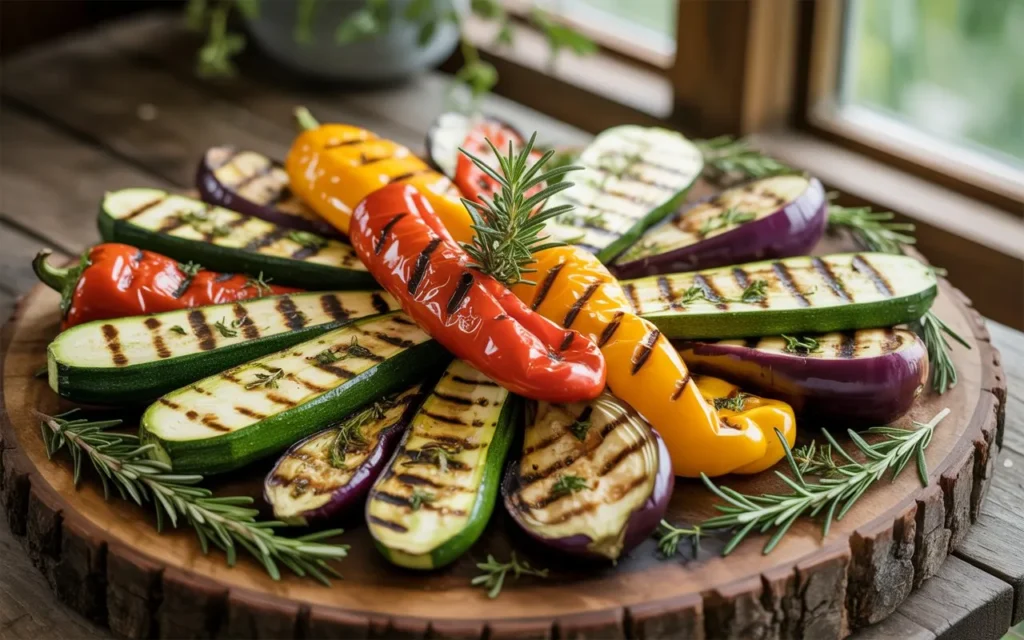
🔥 Perfect Grilled Vegetables with Herbed Garlic Oil 🌿
A vibrant, smoky medley of summer veggies kissed with char and tossed in a zesty garlic-herb marinade. Serve as a side, atop grains, or in sandwiches!
Ingredients
Serves 4–6
Vegetables:
- 2 zucchinis, sliced lengthwise
- 1 large eggplant, sliced into ½-inch rounds
- 2 bell peppers (any color), quartered
- 1 red onion, cut into wedges
- 1 bunch asparagus, trimmed
- 8 oz cremini mushrooms, stems trimmed
- 2 ears corn, husked and halved (optional)
Garlic-Herb Marinade:
- ⅓ cup olive oil
- 3 garlic cloves, minced
- 2 tbsp balsamic vinegar
- 1 tbsp lemon juice
- 1 tsp smoked paprika
- 1 tsp dried thyme or rosemary
- ½ tsp red pepper flakes (optional)
- Salt and black pepper to taste
For Serving:
- Crumbled feta or goat cheese (omit for vegan)
- Fresh basil or parsley, chopped
- Lemon wedges
- Flaky sea salt
Instructions
- Prep the Veggies:
- Toss all vegetables in a large bowl with ½ the marinade (reserve the rest for basting). Let sit 15–30 minutes.
- Grill:
- Preheat grill to medium-high (400°F/200°C). Clean and oil grates.
- Dense veggies first: Grill eggplant, zucchini, peppers, and onions for 4–5 minutes per side until charred and tender.
- Quick-cook veggies: Add asparagus, mushrooms, and corn. Grill 2–3 minutes per side.
- Finish & Serve:
- Transfer veggies to a platter. Drizzle with reserved marinade and sprinkle with fresh herbs, cheese, and flaky salt. Serve with lemon wedges.
🌟 Pro Tips & Variations
Grill Master Secrets:
- Uniform slices: Cut veggies evenly to ensure consistent cooking.
- Basket hack: Use a grill basket for smaller pieces (asparagus, mushrooms).
- Char wisely: Don’t overcrowd the grill—work in batches if needed.
Dietary Swaps:
- Vegan: Skip cheese or use vegan feta.
- Low-FODMAP: Omit garlic and onion; use garlic-infused oil.
Flavor Twists:
- Mediterranean: Add grilled halloumi and olives.
- Spicy: Brush with harissa or chili crisp post-grill.
- Sweet: Drizzle with honey-balsamic glaze.
Meal Prep:
- Grill ahead and refrigerate for 3–4 days. Reheat in a skillet or enjoy cold in salads/wraps.
Why You’ll Love It
- Versatile: Pair with grilled proteins, toss into pasta, or stuff into pitas.
- Healthy & Colorful: Packed with fiber, vitamins, and antioxidants.
- Summer on a Plate: Charred edges + fresh herbs = irresistible flavor!
Pair with chilled rosé, garlic bread, or hummus! 🥂🍞
Nutrition (per serving):
Calories: ~150 | Protein: 4g | Carbs: 15g | Fat: 10g
Fun Fact:
Grilling caramelizes natural sugars in veggies, enhancing their sweetness. The Maillard reaction (that golden char!) adds depth you can’t get from roasting alone.
Fire up the grill and let those veggies shine! 🌞🔥
Watermelon Salad
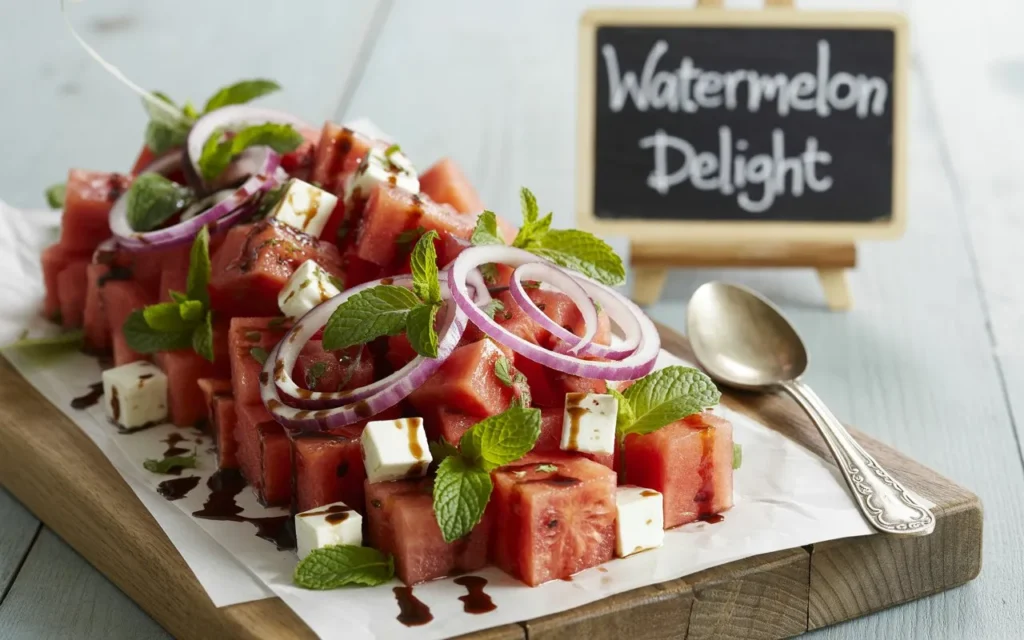
🍉 Watermelon Feta Salad with Mint & Lime 🌿
A refreshing, sweet-savory summer salad with juicy watermelon, creamy feta, crisp cucumber, and a zesty lime dressing. Perfect for picnics, BBQs, or a light lunch!
Ingredients
Serves 4–6
For the Salad:
- 4 cups seedless watermelon, cubed
- 1 cup cucumber, thinly sliced or diced
- ½ cup crumbled feta cheese (sub vegan feta or omit)
- ¼ cup fresh mint leaves, torn
- ¼ cup thinly sliced red onion
- 1 jalapeño, seeded and thinly sliced (optional for heat)
- ½ cup Kalamata olives, pitted (optional)
Lime-Honey Dressing:
- 3 tbsp extra-virgin olive oil
- 2 tbsp fresh lime juice (about 1 lime)
- 1 tsp honey (or agave for vegan)
- ½ tsp flaky sea salt
- ¼ tsp black pepper
- Zest of 1 lime
Garnish:
- Toasted pistachios or almonds
- Fresh basil leaves
- Chili flakes or Tajín seasoning
Instructions
- Prep the Veggies:
- Cube watermelon, slice cucumber, red onion, jalapeño (if using), and olives.
- Make the Dressing:
- Whisk olive oil, lime juice, honey, salt, pepper, and lime zest in a small bowl.
- Assemble the Salad:
- In a large bowl or platter, layer watermelon, cucumber, red onion, mint, and olives.
- Sprinkle feta over the top. Drizzle with dressing.
- Serve:
- Garnish with toasted nuts, basil, and chili flakes. Serve immediately or chill 15 minutes.
🌟 Pro Tips & Variations
Dietary Swaps:
- Vegan: Skip feta or use marinated tofu cubes.
- No Onion: Substitute with pickled shallots for milder flavor.
Flavor Boosts:
- Grilled Watermelon: Lightly char watermelon slices on the grill for smoky depth.
- Creamy Twist: Add avocado slices or a dollop of Greek yogurt.
- Herb Swap: Use basil or cilantro instead of mint.
Keep It Crisp:
- Salt cucumber slices lightly, let sit 5 minutes, then pat dry to prevent sogginess.
- Assemble just before serving to keep watermelon juicy.
Why You’ll Love It
- Hydrating & Healthy: Watermelon is 92% water and rich in vitamins A and C.
- Balanced Flavors: Sweet, salty, tangy, and fresh in every bite.
- 5-Minute Prep: No cooking required—just chop and toss!
Pair with grilled shrimp, crusty bread, or a chilled glass of rosé! 🥂🔥
Nutrition (per serving):
Calories: ~150 | Protein: 3g | Carbs: 15g | Fat: 10g
Fun Fact:
Watermelon is botanically a fruit and a vegetable—it’s part of the cucumber and squash family!
Toss, chill, and savor summer’s sweetness! 🌞✨
Final Touches to Your Cookout Spread
The main dishes are the workhorses of your cookout menu, but these sides make the dream of the perfect side dish a reality (yes, they’re giving off a celestial glow, why do you ask?). This combination of hot and cold sides, creamy and crispy textures and sweet and savory flavors leaves no one in the family out.
Step up your cookout game by presenting food in unexpected ways. Use vibrant serving bowls, garnish with a flourish (fresh herbs, citrus slices), and maybe even have a small serve-yourself toppings bar for things like pasta salad and coleslaw.
Delve into that side for your next party and see your guests leave with their stomachs full and a smile on their faces.
FAQ
A: It’s possible to make many side dishes in advance, including pasta salads, coleslaw, baked beans and potato salad. The day before the cookout, or even several days, gives the flavors time to blend; it also helps make back half the time from the day of.
A: Offer a variety of sides to accommodate a range of dietary restrictions, like gluten-free, vegan or nut-free sides. Be sure to mark each dish clearly, and consider things like quinoa salads, roasted veggies or fresh fruit platters.
A: Have some fun with things like grilled corn with flavored butter, watermelon and feta salad, a spicy mango slaw. These distinctive dishes can help add a new spin on traditional cookout sides.
A: A rough guideline is to aim for 1.5 servings of each side dish per guest (assuming you have more than the Thanksgiving standard of five sides) and the taste determination of your crowd. It’s always preferable to have a little too much instead of running out.


Leave a Reply